THIS TEMPLATE IS NO LONGER SUPPORTED.
Please upgrade to Shopify AI Agent V3.5
Requirements:
This guide requires a Voiceflow account and Streamline Connector installed in your Shopify store.
1. Install Streamline Connector to your Shopify Store
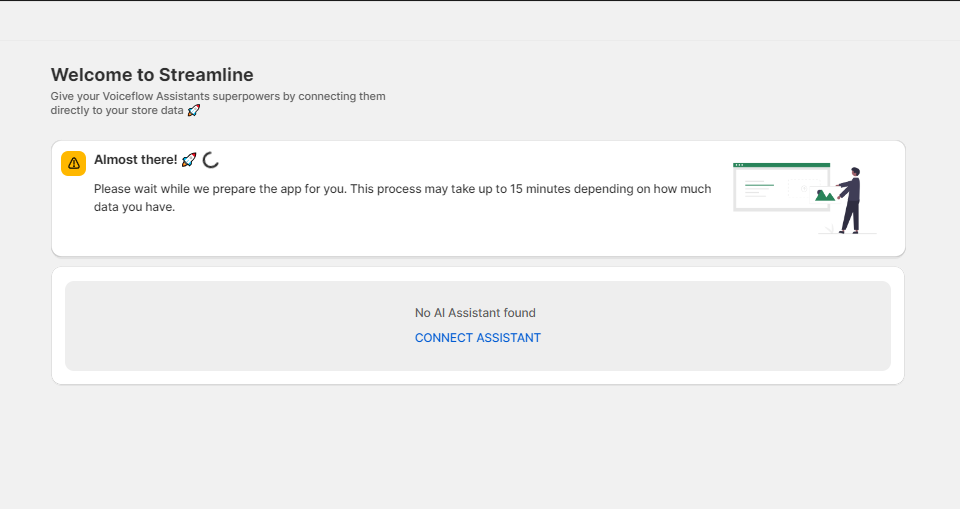
First, install Streamline Connector to your Shopify Store. Once installed, you'll notice a banner indicating that your data is syncing with our database. This process ensures that your store data is synced, allowing the assistant easy access without repeated Shopify API calls. This process typically takes 5 to 15 minutes, depending on the size of your store's data.
THIS TEMPLATE IS NO LONGER SUPPORTED.
Please upgrade to Shopify AI Agent V3.5
Requirements:
This guide requires a Voiceflow account and Streamline Connector installed in your Shopify store.
1. Install Streamline Connector to your Shopify Store
First, install Streamline Connector to your Shopify Store. Once installed, you'll notice a banner indicating that your data is syncing with our database. This process ensures that your store data is synced, allowing the assistant easy access without repeated Shopify API calls. This process typically takes 5 to 15 minutes, depending on the size of your store's data.
For this guide, we're using the 'Shopify AI Agent V3 - Voiceflow Template'.
3. Connecting your Voiceflow Assistant to Streamline Connector
- Step 1: Find Your API Key - Open your Voiceflow assistant project. Go to the "Integrations" tab, and copy the API key.
- Step 2: Connect the Assistant - On the Shopify app homepage, click "Connect Assistant" and enter the copied API key along with the assistant's name. The Chatbot name you give here does not have to match your Voiceflow's Assistant.

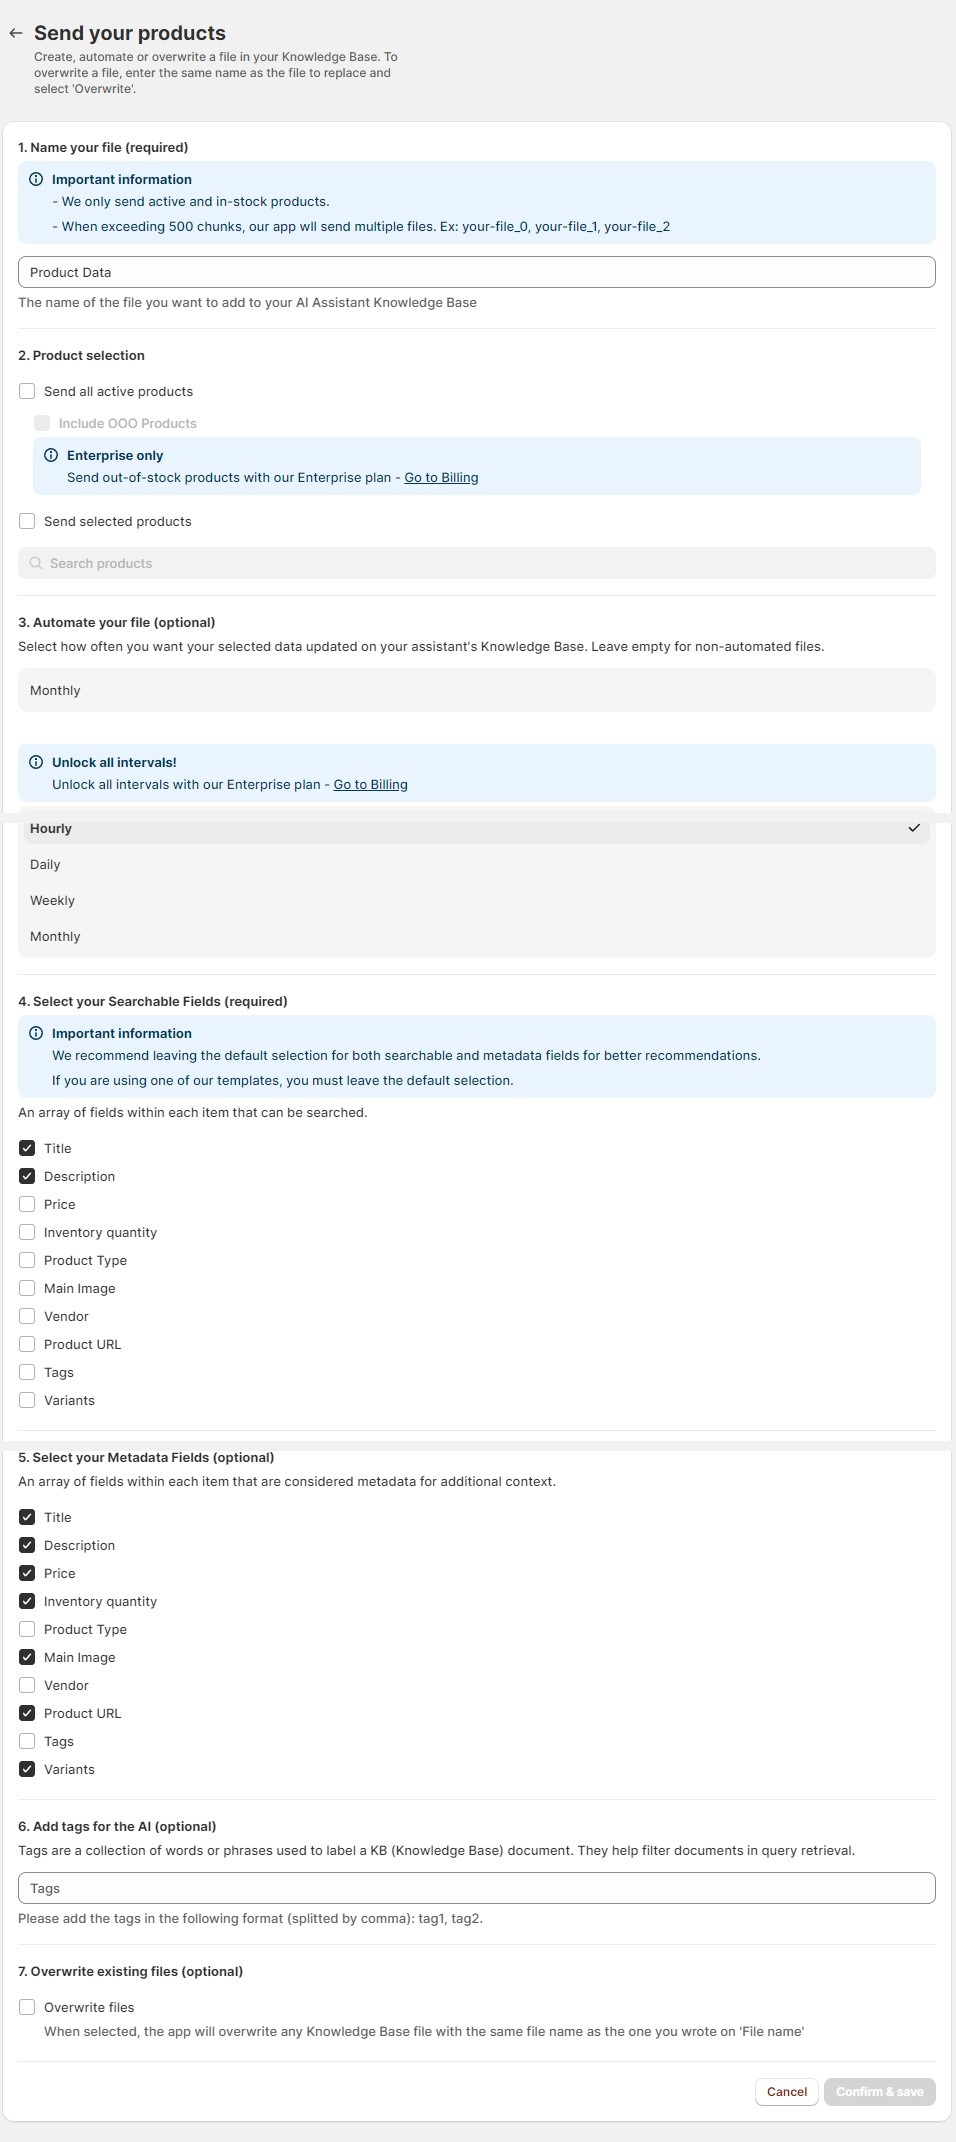
4. Sending your product data
Keep your AI assistant up-to-date with the latest product changes. Our webhooks monitor Shopify updates and automatically
synchronize them with your assistant at your preferred intervals. Once your assistant is connected, easily add active products by
clicking the three dots on your assistant card and selecting 'Manage Data' > 'Create' > 'Send Products' then completing the
required fields. This will update your assistant's knowledge base with a JSON table, enhancing its performance.
Important Note:
- Retain the default selections for searchable and metadata fields to ensure accurate recommendations.
5. Connecting your orders
We've developed a dynamic database of your store's orders to minimize unnecessary API calls to Shopify's Order API whenever
a user inquires, 'Where is my order?' Our system provides an endpoint that retrieves orders associated with a user's email. For
added security, we've included a unique shop ID to ensure that users can only access orders from your store and not from others
linked to their email.
To set this up, follow these steps:
- Click the three dots on your assistant card and select 'Create' > 'Send Orders'.
- Copy the endpoint provided.
- In VoiceFlow, navigate to your Assistant, then:
- Click on 'Content' in the left sidebar.
- Go to 'Functions' and select 'Retrieve Streamline Order'.
- Replace the text on line 17 with the copied endpoint.

Copy the Endpoint URL string.

Navigate to your Assistant in Voiceflow and then click on Functions and then Retrieve Streamline Order.

Replace: 'paste your endpoint in here' with your copied endpoint.
Example:

6. Add the agent to your store
Once you are done and the Assistant is tested, you can hit Publish, navigate to the integration tab and copy the script you will findon Web Chat. Go to your theme > edit code > theme.liquid and paste the code before </body>.

Was this article helpful?
That’s Great!
Thank you for your feedback
Sorry! We couldn't be helpful
Thank you for your feedback
Feedback sent
We appreciate your effort and will try to fix the article